Monday, September 29, 2014

Singing a Happy Tune over my Estate Sale Find

Hi everyone:

After all the wonderful items I purchased at the estate sale on my birthday, you would think that I would be all shopped out - but you'd be wrong! I had barely put away my recent purchases when I received notification that there would be another estate sale coming up. Of course there couldn't possibly be anything else that I would want - or could there?

On the morning of the estate sale my son and I drove up to the north part of town hoping that we'd be one of the first ones in the door. I guess everyone else had the same idea, as we were tickets 54 and 55 (tickets are given out an hour before the sale starts for those eager shoppers). We headed off to the mall to kill an hour or so before returning for our chance to peruse the merchandise on sale. 

I was interested in a small rockinghorse grey stretched Beswick foal, but not at the price of over $300. I'm a collector, but even I have to draw the line somewhere! I did find some old cookbooks and a small Herend china kitten trinket box (or as they call it a "fancy box"). The lady who had lived there obviously loved kitties as there were numerous cat items in the sale. 
Love this Herend trinket box - immaculate and
valued at much more than the $5 I paid for it
I refrained from the vintage linens - only picking up a hand embroidered apron and then headed into the basement, which was full of kitchen items, books and other wonderfulness. In the corner was a vintage Singer sewing machine, which my son pointed out to me. I had known that it was at the sale, but didn't really pay attention since I'd bought so much at the estate sale the previous week-end. I did look to see which model it was - a 301 - and then continued out the door with my purchases.
The Singer 301 sewing machine
Of course I couldn't let this rest. I had to search up the Singer 301 on-line to see what it was all about. 
  • a slant needle sewing machine providing better visibility in the sewing area
  • "light weight" aluminum body - only 16 pounds
  • reverse feed
  • ability to drop the feed dogs
  • arguably one of the best machines that Singer made. 
Hmmm, maybe I should've taken a better look! Later in the afternoon my hubby suggested that we could go back to the estate sale to see if it would still be there. I called the ladies running the sale to see if it was still there and it was! Could they hold it for me for half an hour? Sure and off we went. In my haste to get there, I left anything that would've helped me test the machine, such as my reading glasses and fabric. Luckily they found some fabric for me to use and the machine had thread in it, so I could at least see that it did sew. 
Beautifully detailed machine
The machine body was in excellent shape - very clean and minimal marking. The machine came in a cabinet with a bench with a removable seat which had storage inside. 
Love the storage in the stool
The attachments and a buttonholer came with the machine. Interestingly, the buttonholer was free, but the attachment box cost me an extra dollar. I decided to take the machine, so off we went with it. It wasn't until I got it home and looked at it more carefully did I realize what a treasure I'd found. 

Cabinet and stool for Singer 301
The cabinet itself is beautiful and in excellent shape with hardly any marks on it at all. The bench is in the same condition - not even a rip in the top. The machine is operated by a knee lever, but the foot pedal can be taken out of the cabinet to use on the floor, which is typical of most Singers of this era. 
Stitch Length selector - note worn bobbin winder tire, which has already been replaced
The Singer 301 is designed to be portable and comes out of the cabinet easily using the handle on the top of the machine. There is a drip pan attached to the bottom of the machine, so the area underneath the machine is enclosed when you take it out of the cabinet. 


Hiding in the cabinet
The machine actually locks into a cradle that remains in the cabinet. 
Cradle that remains in the cabinet
I couldn't believe how clean this machine was. No oil residue, no gunky grease to clean out of the bottom or in the gears. Obviously this lady kept her machine pristine. The best part of this purchase was the receipt in the buttonholer box dated 1956. I love finding these bits of history.

Top view of Singer 301
This machine is so pretty that she doesn't deserve to languish in the basement. Instead she has pride of place in the front living room window where everyone who visits can admire her - and the sewing light is great.


Thursday, September 25, 2014

Telecast Thursday - Making the Most of Your Time in 15 Minutes a Day

Hi everyone:

Welcome to Telecast Thursday! I've added a new playlist to my Youtube channel: it's called "Got 15 Minutes?" 

If you're like me, you think that you need at least an hour to accomplish any quilting task, but you're wrong! Okay, don't be mad at me because I said you're wrong - I was wrong too (yes, it does happen sometimes!). You can actually get quite a few things done in less than an hour. In the videos in this playlist, I'll give you suggestions on what quilty items you can get accomplished in ...

  • not an hour, 
  • not even half an hour, 
  • but in just 15 minutes a day.


I know it seems like that wouldn't be enough time for anything - certainly not enough time to watch an episode of Sherlock - but if you focus, you can accomplish more than you think.

There are many more videos in this series, so be sure to subscribe to my Youtube channel, to receive automatic notifications when new videos are posted. You can also just click on the logo on any of my videos to allow you to subscribe to my channel.

You can watch the first video in this new playlist on my Youtube channel or below.


If you have any suggestions on what quilty items you can work on in just 15 minutes, leave a comment below.

Happy Quilting!

Monday, September 22, 2014

Quilts and Pillows and Softies, oh my!

Hi everyone:

This past week-end we travelled up to Edmonton to visit Sarah at university - and to take a look at a vintage Singer sewing machine, but that's another blogpost! This trip reminded me that I had promised to tell you about the other items that I made for Sarah to have in her residence room.

Since residence rooms are not very homey, I thought that some soft furnishings would be welcome. As Sarah is a huge Harry Potter fan, the subject matter was obvious; I just had to decide what to make. 
Sarah's quilt
Since I'd already made her a quilt, I thought that a throw pillow would be nice and decided that I would use the same orange flannel backing fabric from the quilt to make the pillow back. Well that was easy, but what about the front of the pillow? Again, Harry Potter to the rescue! I traced a Deathly Hallows symbol on a plain fabric background and embroidered it using a chain stitch. You'll notice a slight difference in the symbol - this is how Sarah always draws it, incorporated the lightning bolt through the centre of the design. Borders added around the outside, back completed, pillow form inserted and the pillow was done.

Pillow with Deathly Hallows symbol
But this was not quite enough yet. Sarah had drawn a small Dobby figure and partially completed the embroidery before grade 12 activities took over. I finished the embroidery and made it into a little softie. I enlarged the outline of the figure and cut the embroidered fabric and backing fabric to this shape. These pieces were stitched together, right sides together, leaving a small opening at the side to turn. I then turned it right side out and stuffed Dobby and then whipstitched the opening closed. I think he turned out very well and is now a companion to the Harry Potter softie that I had previously made for Sarah. 
Dobby front
Dobby back
Dobby nestled in a sleeping bag (sleeve from a sweater)
Things are looking a bit more homey in Sarah's room now.

I had to make sure that Dobby had his sock - he is a free elf, after all!

Thursday, September 18, 2014

Telecast Thursday - And Now for Something a Little Bigger

Hi everyone:

Welcome to Telecast Thursday. Can you believe that we're already halfway through September? Even though we're not at the end of the month yet, we are at the end of this playlist - for now. I intend to add more videos to this playlist in the future with information and practical advice about the Singer Featherweight sewing machines as well as details about my latest addition to my Singer collection. Yes, I have added another machine to the group, but I'm not telling you any more about it right now. And no, I don't have a problem with this obsession!

In this final (for now) video in this series, I'll show you another vintage Singer machine, but this one is a little different. I did promise you something bigger this week, didn't I? 
I acquired this machine and its table for the same amount of money that it would've sold brand-new. Not too bad a deal I don't think with the 50+ year gap in purchase date.

If you haven't already subscribed to my Youtube channel, be sure to do so to receive automatic notifications when new videos are posted.

Do you own a Singer 99-13? I'd love to hear about your vintage sewing machine obsession in the comments below.


Monday, September 15, 2014

University Bound with a Quilt, of Course

Hi everyone:

There have been a lot of changes this summer in my household and suddenly it's much quieter around here. Why? My daughter has started university and is now cozily ensconced in her own private room - with private bathroom - at Campus Saint-Jean at the University of Alberta in Edmonton. Although she isn't the noisiest one in our household (I think my son and I are tied in that respect), it is definitely quieter around here. It could be that with one child out of the house, the remaining one isn't able to carry on the sibling discussions that have been so popular in recent years. In any event, it was time for Sarah to take that big leap into adulthood and we reluctantly drove her up to Edmonton to settle into university life (yes, mea culpa: I did encourage her to accept that university's offer). 
I used the "Wordplay" panel for the centre of the quilt
When she graduated from high school at the end of June I decided to make her a quilt. Although I had grandiose ideas of what I would design for her, I realized that I probably wouldn't have that quilt made until she had graduated from university, so I opted to use a panel to make her quilt. It was a great idea as I actually finished the quilt in time for her graduation. Yay! I think it turned out quite well and I used an orange flannel for the backing as that is her favourite colour. 
A sample of the quilting on Sarah's quilt
When it came to the quilting, I really wanted to do something special, so I decided to free motion quilt a saying from Harry Potter (actually from one of the movies, for those purists out there) around the border as Sarah is a huge HP fan. 
I was pleased at how the words turned out
I wrote out the words in the appropriate scale and then traced then onto the quilt and machine quilted over them. I was pleased with the result - I didn't want the words to overwhelm the quilt, but to be rather in the background for the viewer to discover. 
"Always"
If you're wondering what I quilted, it is: "Happiness can be found, even in the darkest of times, if one only remembers to turn on the light" Albus Dumbledore. I also stitched a Deathly Hallows symbol on the border.
Quilting details on the back of the quilt
While I was pleased at how this project turned out, I then realized that Sarah would probably need some other quilty items for her birthday and dorm room. More projects to think up and create! I'll tell you all about these projects in a future blogpost.
Charlie approved


Thursday, September 11, 2014

Telecast Thursday - All About Accessories

Hi everyone:

This Thursday I'll be continuing my series on vintage sewing machines. In this video I'll be examining the myriad accessories that come with the Singer Featherweight sewing machines. They may look strange, but they can do lots of practical things - just watch out for that ruffler!


If you haven't already subscribed to my Youtube channel, be sure to do so to receive automatic notifications when new videos are posted.

Just a hint about next week's video - it'll be a little bigger.

Monday, September 8, 2014

QAYG - Part 3 - Using a Jelly Roll

Hi everyone:


When constructing my latest QAYG project I decided to use a jelly roll. The fabrics would already be coordinated for me and cut, so this would save me time. But... I wanted to add more interest to the table runner and didn't want every strip to be 2 ½", so I decided to trim the jelly roll strips so they would be different widths. Here's how I constructed my table runner:

First, I decided on the finished length and width of the table runner. I cut a piece of batting larger than this and marked off the width and length of the table runner on the batting with a black marker to ensure that my fabric strips would cover this. I would be trimming the pieced top and batting down to this size after I'd finished stitching. 
Getting ready to mark the batting
Batting marked - I should probably have left more of a margin
from the drawn line to the edge of the batting to allow for shrinkage
Next, I opened up the jelly roll and chose one strip to be the centre strip. I wanted the table runner to be symmetrical with strips repeating on either side of the centre strip and I wanted a variety of widths in the fabric strips. I selected a variety of jelly roll strips then laid them out to one side of this centre strip. I made sure that I had more strips than required to cover the batting as I was going to be trimming them in width in the next step. 
I chose the "tape measure" fabric to be the centre strip
and then laid out other strips to either side of it
I randomly trimmed the width of the jelly roll strips so each one was a different width than the strip to either side of it. This added variety and gave interest to the project.
After trimming the width of the strips, I cut each strip in half length-wise and then laid them out on either side of the centre strip, again checking to ensure that the fabric strips would cover the batting base. I had to remember to account for seam allowances, so I overlapped the strips a bit when laying them out.
Note the variety of strip widths
Everything looked okay, so I laid the centre strip over the marked centre line on the batting, laid the second strip on top and sewed them to the batting with a ¼" seam. I then pressed them open. Yeah, the project was started!

I continued to add strips to the right and left of the centre strip, pressing them open as I went along until the batting was covered.

I'm pleased with this project so far and glad that my decision to trim the jelly roll strips added more interest to the table runner. Next I'll have to trim the top and add the backing  to it. Then it will be time to actually quilt it. I guess I'll have to decide on a quilting motif. Any suggestions you have would be appreciated. Just leave them in the

comments below.

Thursday, September 4, 2014

Telecast Thursday - More Vintage Sewing Machines

Hi everyone:

I'm so glad it's Telecast Thursday! This week I've added another video to my new playlist, "Vintage Sewing Machines". 

You've already heard about my first vintage Singer sewing machine. This week you'll learn more about how I acquired the next machine in my collection - and what has become a new obsession for me. I just can't seem to resist these little sewing beauties!

If you haven't already subscribed to my Youtube channel, be sure to do so to receive automatic notifications when new videos are posted.

Do you own a Singer Featherweight sewing machine? If so, let me know its story in the comments below. 

Monday, September 1, 2014

QAYG - Part 2 - The Continuing Experiment

Hi everyone:

Happy Labour Day to all my Canadian readers. I hope you're still enjoying some summer-like weather and having a great day off!

I've been continuing my experiment with the QAYG techniques. My latest method is to piece the top to the batting only and add the backing and quilting after the top is done. While this is similar to the traditional method of piecing, it has one advantage: you don't have to pin the quilt top before you quilt it. Yay! I dislike pinning and usually use spray basting to construct my quilt sandwich. Hopefully this method would save me from spraying and pinning - and having to be outside or wear that respirator when I do it!

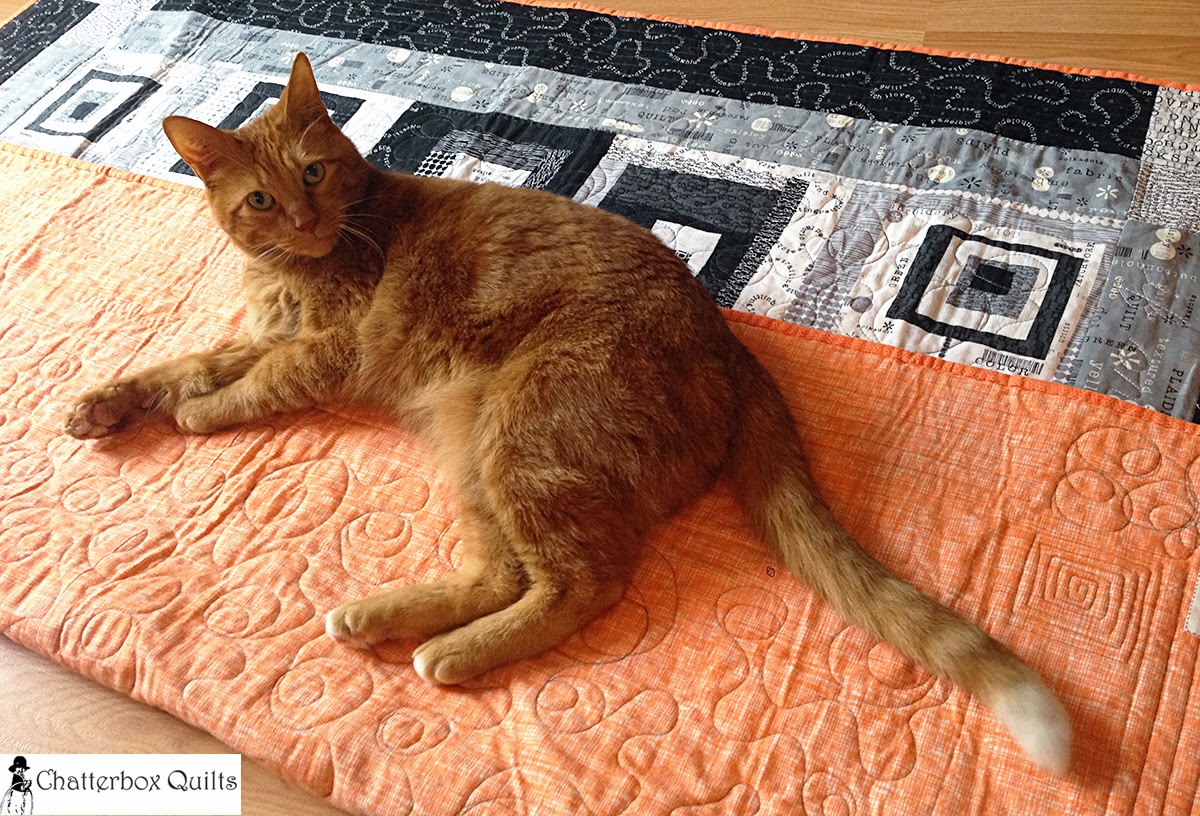
In this QAYG project, I am using a jelly roll to make a table runner: it's really just strip piecing. This is quite fast and I don't have to think too much about picking out fabric as it is already coordinated for me. I have adjusted the jelly rolls strips to add variety and will tell you about this in a future blogpost. 
I did start to do some straight line quilting in this project, but stopped and decided that I would do all over quilting when I have completely finished the top.

It's interesting how QAYG sucks up the batting and backing of the project (if you have the backing on at this stage). While I don't usually notice the quilting doing this on my regular projects, I really noticed it here, so having batting and  backing that is larger than the top is crucial with this method. I haven't yet squared (or rectangles in this case) up the top yet, but I can see that I've used up more of the batting than I had expected. Hopefully I won't have to trim the top down too much... just enough to even out all the edges.
Here are the advantages - and disadvantages - that I noticed when piecing the top and batting together and doing the quilting later:

PROS: 

  • Can do an overall quilt motif after the piecing is done, as in traditional piecing.
  • Could do a pillowcase binding method, rather than the traditional hand binding, potentially saving some time in that part of the project.
  • Using the pillowcase binding method makes it easy to add hanging tabs that are already stitched into your project when you add the backing.
CONS: 

  • Quilting is not done until after you've finished piecing, so this is more like constructing a traditional quilt top.
Have you tried QAYG? Let me know your thoughts on this process in the comments below.


Next week I'll tell you how I used a jelly roll to do the QAYG table runner and what adjustments I made while using it.